
Atlassian announced self-hosted Runners for Bitbucket Pipelines, let's try them out.
Runners can be configured on 2 levels:
- Workspace level
- Project level
Let’s see how can we create Runners in Workspace level.
How to create a Runner? #
Create a new Workspace Runner in Bitbucket #
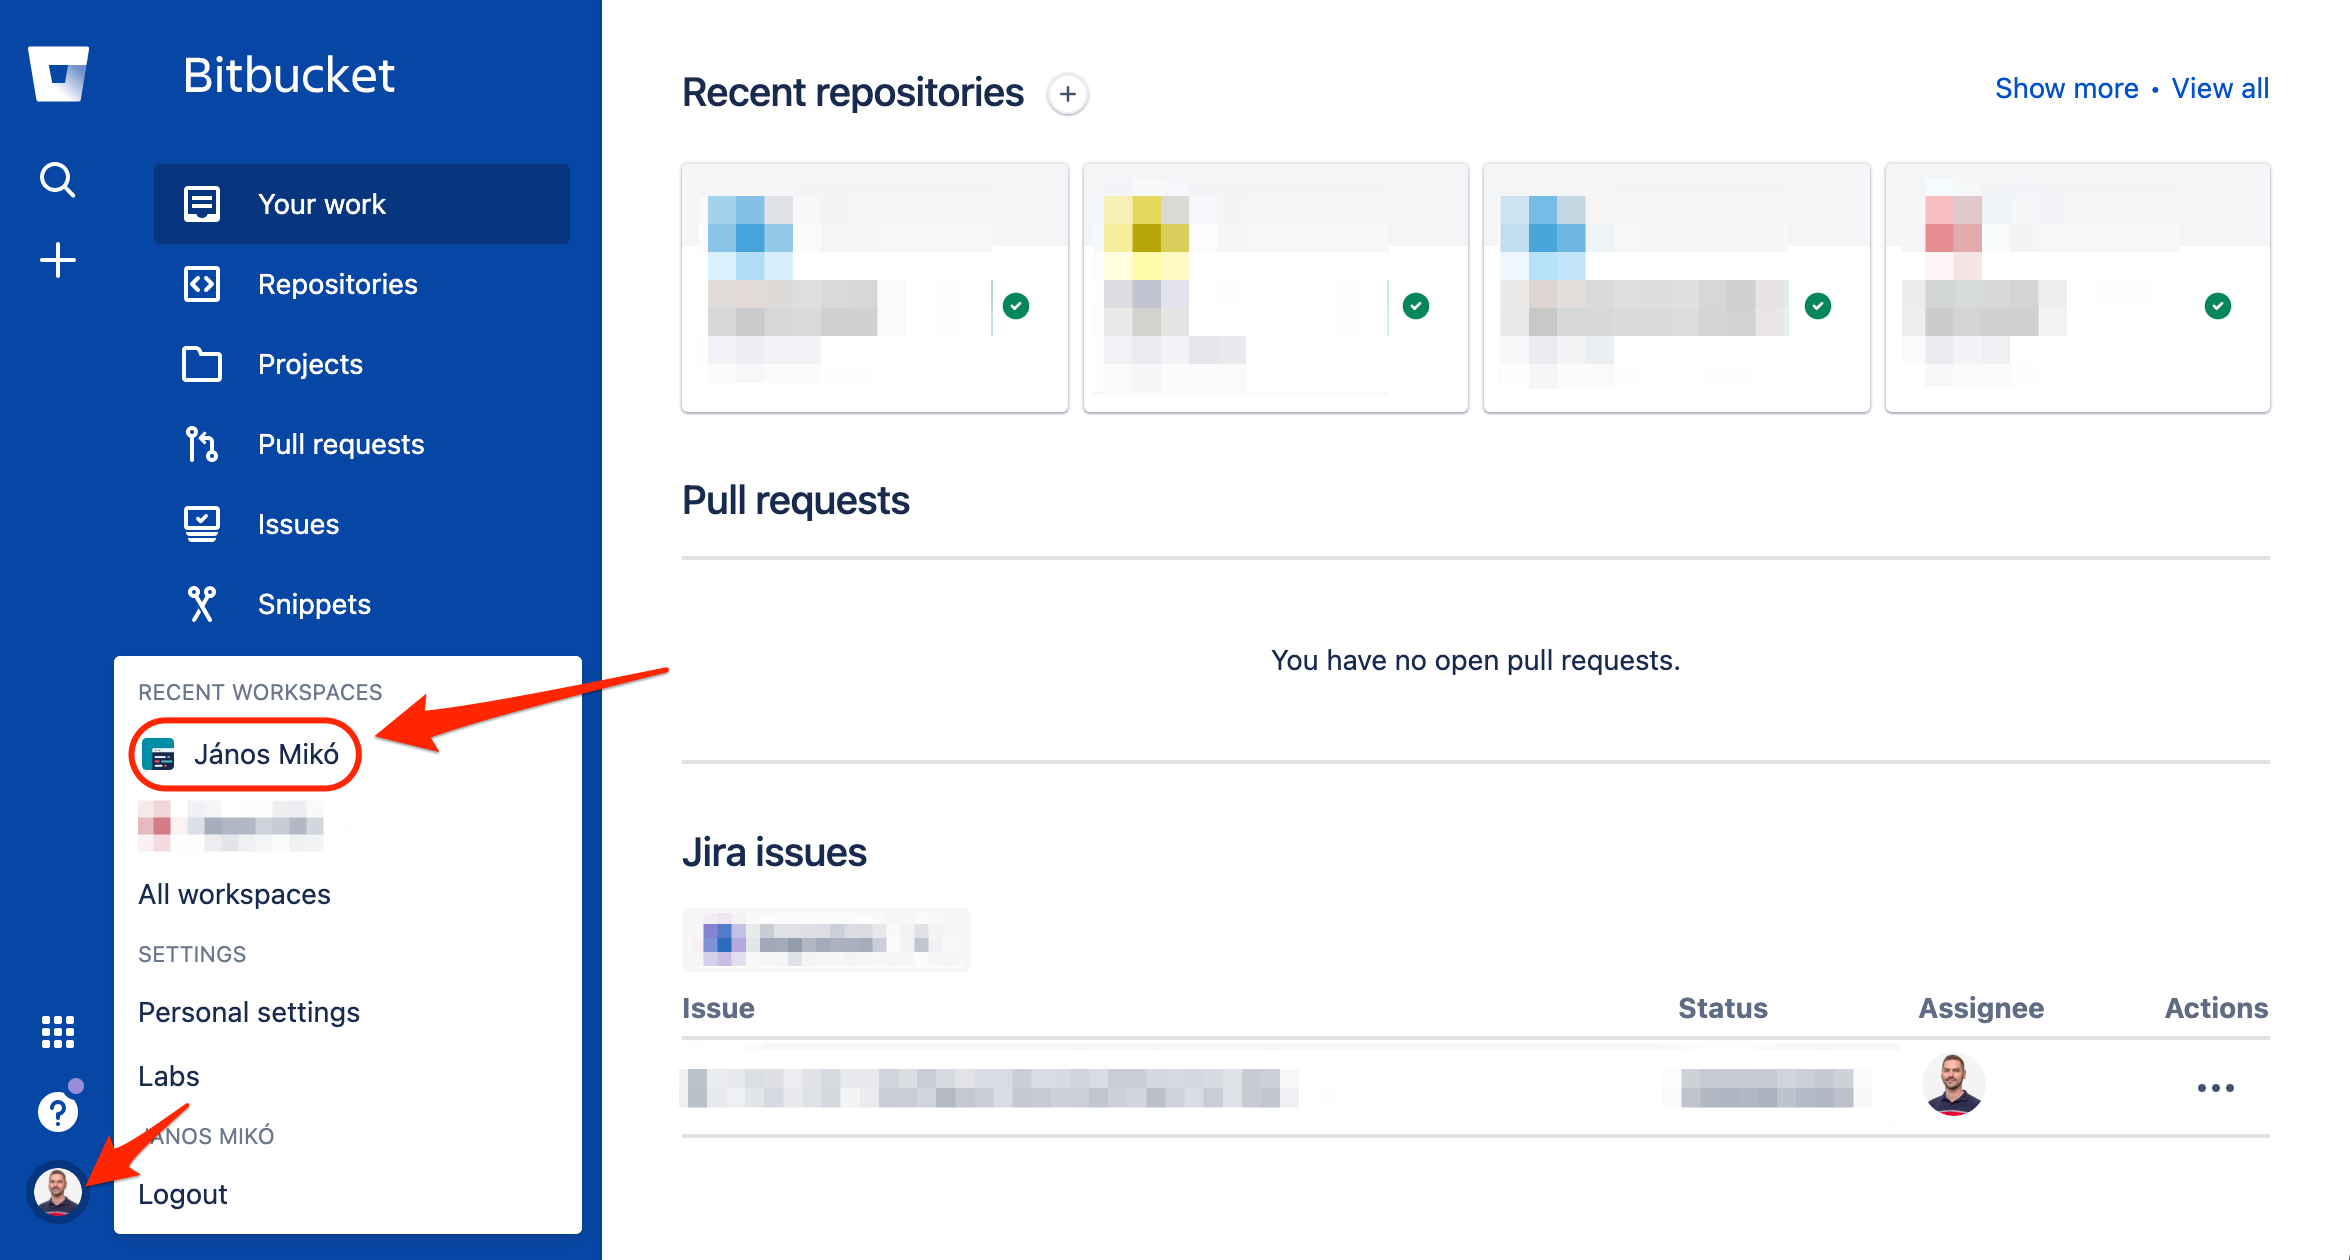
Go to the Workspace Settings: click on your Profile Picture and Select the Workspace.
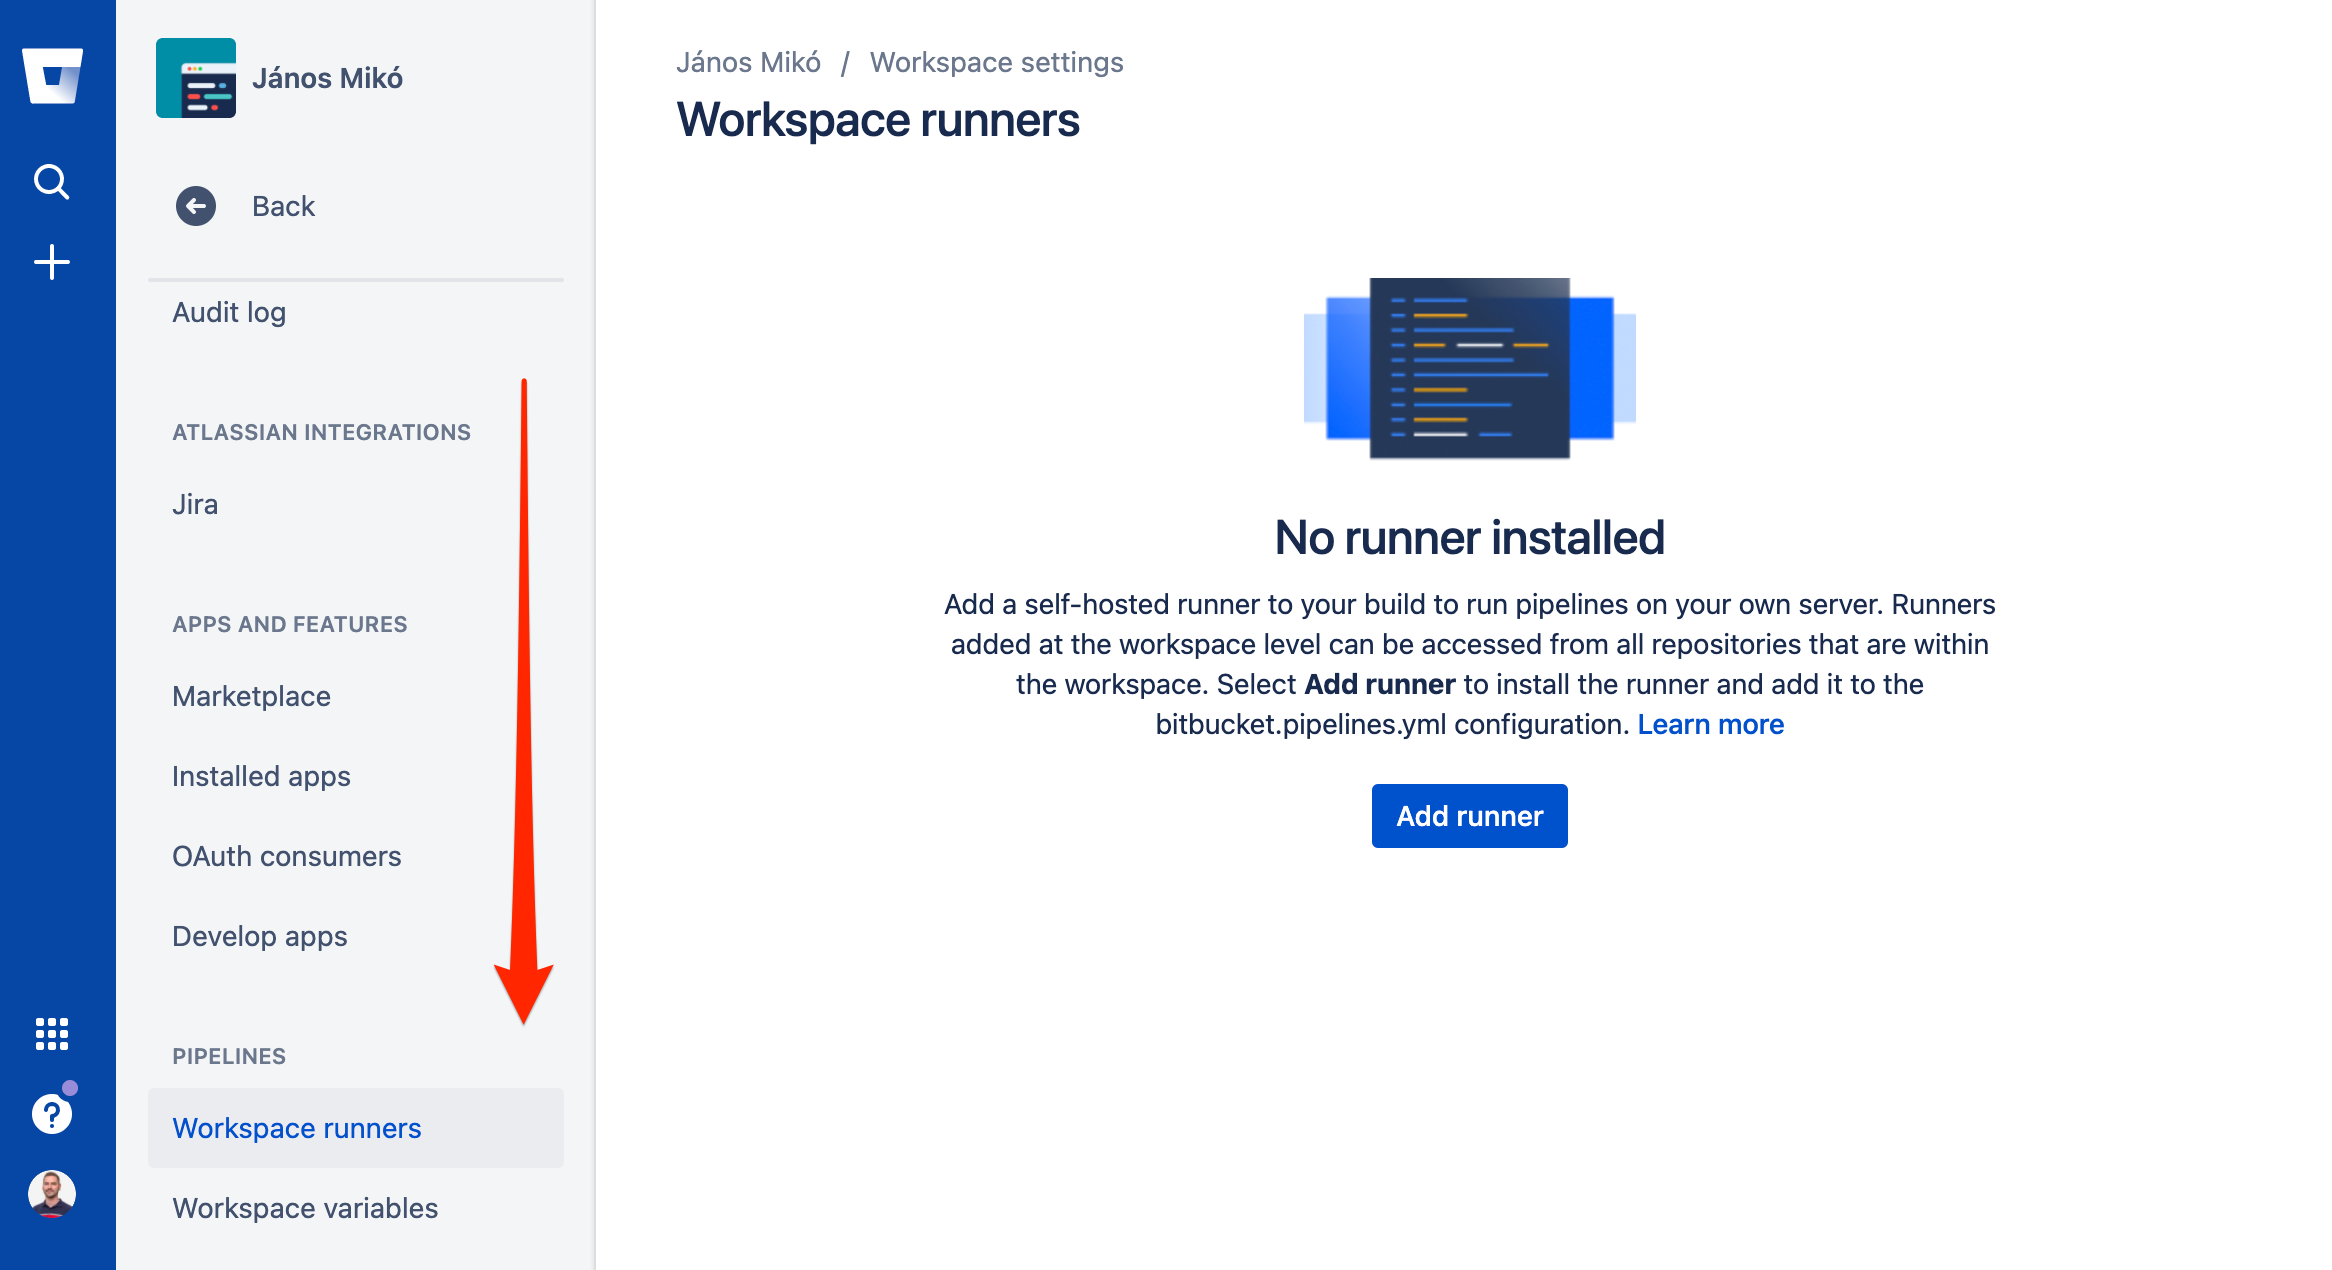
Click on the Settings and Scroll down to Workspace Runners and click on Add Runner.
Give your runner a name and click on next.

It is going to give you a command output like this:
docker container run -it -v /tmp:/tmp -v /var/run/docker.sock:/var/run/docker.sock \
  -v /var/lib/docker/containers:/var/lib/docker/containers:ro \
  -e ACCOUNT_UUID={__ACCOUNT_UUID__} \
  -e RUNNER_UUID={__RUNNER_UUID__} \
  -e OAUTH_CLIENT_ID=__OAUTH_CLIENT_ID__ \
  -e OAUTH_CLIENT_SECRET=__OAUTH_CLIENT_SECRET__ \
  -e WORKING_DIRECTORY=/tmp \
  --name runner-7deb7740-f86b-50d0-9c85-671fcb3c9038 \
  docker-public.packages.atlassian.com/sox/atlassian/bitbucket-pipelines-runner:1
Save it and click on finish.
You have to extract the ACCOUNT_UUID, the RUNNER_UUID, the OAUTH_CLIENT_ID and the OAUTH_CLIENT_SECRET variables from the command.
Watch out for the following:
- Copy the
ACCOUNT_UUIDand theRUNNER_UUIDwithout the curly braces. - Make sure to copy the whole
OAUTH_CLIENT_SECRET(it may contain special characters like dashes or underscores). - The
OAUTHvariables have to be converted to base64.
You can fill the following script and later generate the k8s resources using these variables:
export ACCOUNT_UUID=__ACCOUNT_UUID__
export RUNNER_UUID=__RUNNER_UUID__
export OAUTH_CLIENT_ID=__OAUTH_CLIENT_ID__
export OAUTH_CLIENT_SECRET=__OAUTH_CLIENT_SECRET__

export BASE64_OAUTH_CLIENT_ID=$(echo -n $OAUTH_CLIENT_ID | base64)
export BASE64_OAUTH_CLIENT_SECRET=$(echo -n $OAUTH_CLIENT_SECRET | base64)
Note: if you are using an echo command which doesn’t support -n (skip trailing newline) you can change base64
behaviour to ignore it using the following flag: base64 –wrap 0.
Thanks Dave Harvey for pointing this out!
Implementation in Kubernetes #
Now on the interesting part. Replace the ${VAR_NAME} placeholders with the contents of those variables.
Important:
- use the base64 encoded versions of the OAUTH variables in the
secret.yaml - keep the quotes and braces (
",{,}) in the job.yaml lines 17 and 19
The following bash scripts are going to generate the secret.yaml and job.yaml files in the current working directory.
secret.yaml:
cat > ./secret.yaml <<EOF
apiVersion: v1
kind: Secret
metadata:
  name: runner-oauth-credentials
  labels:
    accountUuid: ${ACCOUNT_UUID}
    runnerUuid: ${RUNNER_UUID}
data:
  oauthClientId: ${BASE64_OAUTH_CLIENT_ID}
  oauthClientSecret: ${BASE64_OAUTH_CLIENT_SECRET}
EOF
job.yaml:
cat > ./job.yaml <<EOF
apiVersion: batch/v1
kind: Job
metadata:
  name: runner
spec:
  template:
    metadata:
      labels:
        accountUuid: ${ACCOUNT_UUID}
        runnerUuid: ${RUNNER_UUID}
    spec:
      containers:
        - name: bitbucket-k8s-runner
          image: docker-public.packages.atlassian.com/sox/atlassian/bitbucket-pipelines-runner
          env:
            - name: ACCOUNT_UUID
              value: "{${ACCOUNT_UUID}}"
            - name: RUNNER_UUID
              value: "{${RUNNER_UUID}}"
            - name: OAUTH_CLIENT_ID
              valueFrom:
                secretKeyRef:
                  name: runner-oauth-credentials
                  key: oauthClientId
            - name: OAUTH_CLIENT_SECRET
              valueFrom:
                secretKeyRef:
                  name: runner-oauth-credentials
                  key: oauthClientSecret
            - name: WORKING_DIRECTORY
              value: "/tmp"
          volumeMounts:
            - name: tmp
              mountPath: /tmp
            - name: docker-containers
              mountPath: /var/lib/docker/containers
              readOnly: true
            - name: var-run
              mountPath: /var/run
        - name: docker-in-docker
          image: docker:20.10.7-dind
          securityContext:
            privileged: true
          volumeMounts:
            - name: tmp
              mountPath: /tmp
            - name: docker-containers
              mountPath: /var/lib/docker/containers
            - name: var-run
              mountPath: /var/run
      restartPolicy: OnFailure
      volumes:
        - name: tmp
        - name: docker-containers
        - name: var-run
  backoffLimit: 6
  completions: 1
  parallelism: 1
EOF
Apply the generated manifests to Kubernetes:
kubectl create namespace bitbucket-runner --dry-run -o yaml | kubectl apply -f -

kubectl -n bitbucket-runner apply -f secrets.yaml
kubectl -n bitbucket-runner apply -f job.yaml
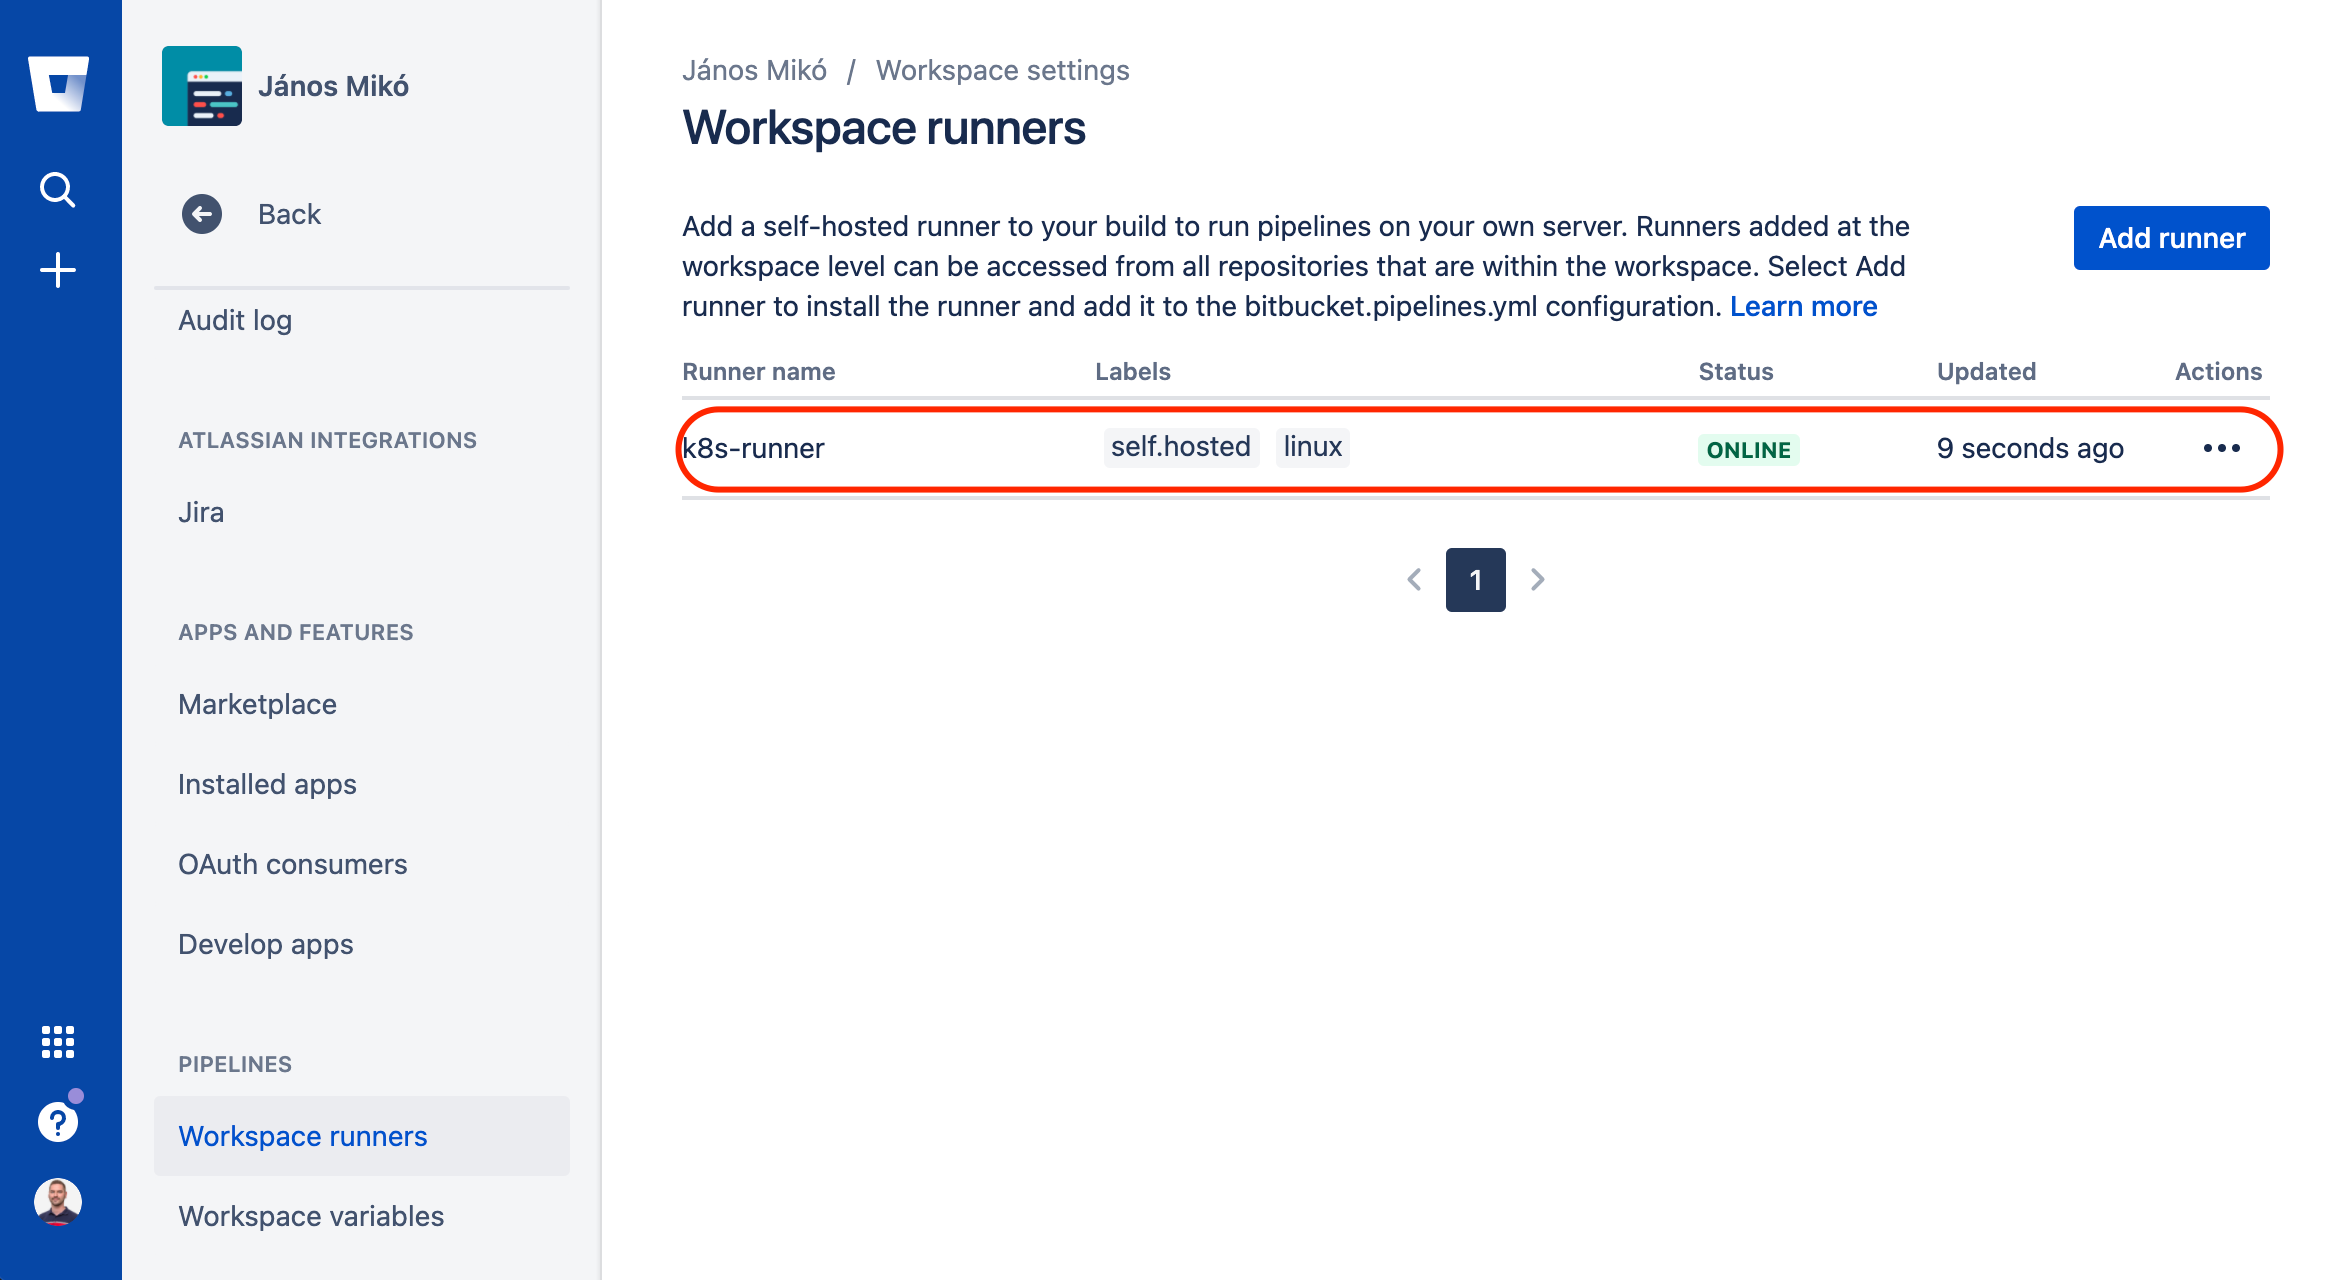
If everything went fine, you will soon see the runner with ONLINE status on the Workspace Runners page.
If you decide to delete the runner from Kubernetes, you run the following steps:
kubectl -n bitbucket-runner delete -f job.yaml
kubectl -n bitbucket-runner delete -f secret.yaml

kubectl delete namespace bitbucket-runner
How to use this runner in a Bitbucket Pipeline? #
It’s pretty straightforward, add the runner’s labels to the pipeline step.
bitbucket-pipelines.yml:
pipelines:
  custom:
    pipeline:
      - step:
          name: Step1
          # default: 4gb, 2x: 8GB, 4x: 16GB, 8x: 32gb
          size: 8x
          runs-on:
            - 'self.hosted'
            - 'my.custom.label'
          script:
            - echo "This step will run on a self hosted runner with 32 GB of memory.";
      - step:
          name: Step2
          script:
            - echo "This step will run on Atlassian's infrastructure as usual.";
Possible Issues #
Status 500 in Bitbucket Pipelines #
As I wanted to build Docker images (using Docker in Docker or dind) in our pipeline I faced the following issue:
Status 500: {"message":"io.containerd.runc.v2: failed to adjust OOM score for shim: set shim OOM score: write /proc/PROC_ID/oom_score_adj: invalid argument\n: exit status 1: unknown"}
How to fix it #
First I tried to find root cause of this error message, but I couldn’t find anything except some comments about this was already fixed in containerd’s latest release, and so on… So I decided to check if the software versions are matching. Even while containerd was matching the required version I found that the Docker on the servers are a bit outdated (19.03) so I decided to update it.
After the upgrade I still saw the previously mentioned error messages in the Bitbucket Pipelines.
I verified Docker version running on the server:
# docker --version
Docker version 20.10.7, build f0df350
I replaced docker in docker (dind) container image version to use the exact same version as the installed one on our k8s cluster.
job.yaml:
- name: docker-in-docker
  image: docker:20.10.5-dind  ->  docker:20.10.7-dind
And magically the error went away and everything works as expected.
Pipeline is hanging #
The next issue I faced was a bit trickier to catch.
First things first: how does Bitbucket Pipelines Runner run a single docker build?
- You start your self-hosted Runner alongside a docker-in-docker container.
- Spoiler Alert(!): The Runner is going to launch its own docker-in-docker container and use this to build containers.
So docker-in-docker-in-docker-in Kubernetes. Whoa.
About the issue. Sometimes the pipelines ran without issues. But when I tried to build docker images, it started to timeout randomly (after 120 minutes). At first glance, I checked the steps inside the docker build (like npm install / yarn install and so on). These steps seemed to work well in an isolated environment. They also ran well using Bitbucket Cloud’s Pipeline.
So this problem only occurred running docker-in-docker in Kubernetes.
I decided to check the problem where it occurs. Let’s put a sleep 100000 to the Dockerfile entrypoint, and go down to the deepest layer of this docker-in-docker-in-docker nightmare.
After a kubectl exec - to the docker-in-docker pod - and 2 docker execs - 1st to the docker-in-docker of Bitbucket Pipelines, 2nd to the real build container -, I’ve found a clue. Even if I ran the apt-get update command it hanged. But if I interrupted and rerun it, then it was successful. And this was reproducible by recreating the pipelines. After a short search, I found some blog posts about issues with Docker in Docker and network MTU.
| Network MTU is the Maximum Transmission Unit. If in one network layer it’s larger than on the other, the network packet is not going to fit the network.
OK, check the MTUs on each layer from top to bottom.
- The Network MTU on the Ethernet level was set to
1500. - The Network MTU on the 1st Docker network level was set to
1500. - The Network MTU on the Kubernetes pod network (calico) level was set to
1450. 🤯 - The Network MTU on the 2nd Docker network level was set to
1500. - (at this point I didn’t know there’s a 3rd Docker network level).
Here we go, we have an issue here, the second-level Docker packets are not going to fit the K8s’ network.
How to fix it #
Run your docker-in-docker with the following argument:
--mtu=1300.
Easy, change the Kubernetes Job to use this param:
job.yaml:
- name: docker-in-docker
  image: docker:20.10.7-dind
  args:
    - "--mtu=1300"
Restart the pods, wait for the wonder. And it still failed.
Let’s check it again.
(Somewhere around this time I discovered the fact Bitbucket Pipelines Runner runs its own docker daemon.)
- The Network MTU on the Ethernet level was set to
1500. - The Network MTU on the 1st Docker network level was set to
1500. - The Network MTU on the Kubernetes pod network (calico) level was set to
1450. - The Network MTU on the 2nd Docker network level was set to
1300. - The Network MTU on the 3rd Docker network level was set to
1500. 🤯
The third layer of Docker is still 1500? How? And why?
Because Bitbucket Pipelines Runner is going to launch its very own, dedicated dind and that’s not going to inherit the MTU.
How to fix it (part 2) #
Let’s build our own docker image and pass it to the Pipeline.
bitbucket-pipelines.yml:
definitions:
  services:
    docker:
      image: rewardenv/docker:20.10.7-dind
      variables:
        DOCKER_OPTS: "--mtu=1300"
And voilà! The build process runs without any issues.
Further reading: